I still find myself blending the two words into one verb of fantastical possibilities..... Anywho....
I have started back up with the Yudu today due to a needed day off and some killer joint pain in my feet....no work, just screenprinting.... see one word......
I first needed a new screen since the two I have are already burned and have great
 designs on them that I intend to keep for a while. Kevin was sweet enough to pick up a new screen for me.
First step is to wet the screen. I have found that a wet (but not dripping) paper towel works best. The thicker the better. When the screen is wet, put the dull side (shiny side is the plastic covering) of the emulsion sheet down onto the flat side of the screen (or the side that is flush on all corners, trust me, I've screwed this up before.... make sure there are no airbubbles, or light green spots, these are enemies....

Then comes the drying. One push of the button simply does not do it. Three times and a hairdryer on low cool heat works best. Be sure that it is dried completely. If there are any tacky parts to the emulsion its just not dry...DO NOT PEEL the plastic back if it is tacky...
While drying- print off or draw your design on the the transparencies... silhouettes made of paper are also cool...the TimberDog design
 that is on the blog earlier was simply paper.This activity kills time while the emulsion dries... To make ink-jet printed images more defined, I rely on a good ol' Sharpie to hand fill the design. This allows for the light to be properly blocked when exposed.
Once the emulsion is dry place the designs print side up on the glass, then the flat side of the screen down.... EXPOSE.... not yourself.....the screen....
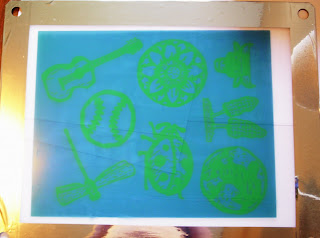
The green emulsion sheet will turn blue. Where the designs lay, it should be green....wash gently. I usually put the whole screen into the shower,
 and use the hand-held shower head on lukewarm spray and my hands... this works easily without scratching the screen fibers...
Once the designs are no longer green, and the green is down the drain...dry... again.... three times and a hairdryer.
Then comes the fun part, tape off the design you want to print (or just the sides if you went with a full page design).... Make sure everything is centered.
It can prove difficult when doing c
 entered graphics from small designs like these.... flashlights and a partner help to shine the light directly down to really be able to center the graphic onto the fabric. Also putting a dark colored piece of tape in the center underneath the fabric helps...
Slightly lift the screen and put a stream of ink directly above the de
 sign, pull ink lightly downward first.
Lower the screen and pull with more pressure to press ink onto the fabric. Hold the fabric in place when lifting the screen up again.
