Sunday, February 6, 2011

Flower Pin Mania

So after a morning of relaxation, I wanted to get a little crafty today while the dogs napped and my husband did his usual little projects around the house.  I had some felt, so I decided to make a few flowers to put onto pins to jazz up the many sweaters  I wear to work. I realized that this is an adorable and inexpensive way to decorate. I have broken it down to show how inexpensive it is.


Things you will need:
Felt Sheets (about 29¢ each at Michaels)
Hot Glue Gun and a few glue sticks (1.00 at DollarTree) 
Mini Glue Sticks (1.00 for a bag of 20 at DollarTree)
Scissors
Pin Backs or old button pins (60 for 2.99 at Michaels)


First cut the felt into 2 inch strips

 Then fold in half lengthwise, secure each end with a dab of glue


Then cut small slits halfway through the fold


Next, start to wrap in a circular motion keeping the straight edge flush to itself, securing halfway with another dab of glue on the edge.


Add glue to the flat part of the pin back, and Viola!

Sunday, January 16, 2011

Maxi-Dress Extrordinaire

I felt crafty today.
Let's just say it all started with the idea of felted flowers with the leftover roving from the slippers.  Then came the eureka moment of "I have a lot of old t-shirts and tanks that have either been worn to much, have small stains, or just have become too shoved in the bottom of the drawer."


So I took the idea, made a pin- it was cute...but not enough to cure my need for crafting today. 

I found my scrap material bag and managed to find some old curtains that a friend had given to me in hopes of them having a second life.  Well, lets just say- what a life they will lead.  I managed to find an old tank that matched, pined some box pleats with the curtains onto the tank, sewed and viola- Maxidress!


Thanks to my new dress form given to me by my sweet husband, I have a well fitted, strongly constructed garment.   Can't wait to wear it on a spring day!


Sunday, December 19, 2010

Felting 101

After seeing a gorgeous pair of felted slippers, I thought I should attempt to make a pair for my grandmother for the holidays.

9 oz of Merino Wool Roving


I first bought the required supplies:

8 oz Merino Wool Roving (found on Etsy)

Small Washboard

Bubble Wrap

Dish Soap

Spray Bottle for Water

First trace the size of the foot you would like to fit giving about an inch extra when cut making a bootie shaped pattern.


This is then transferred to bubble wrap, connecting the two booties at the top so there is no separation between the two, making a square horseshoe shape. Also cut two large sheets of bubble wrap larger than the horseshoe shape.


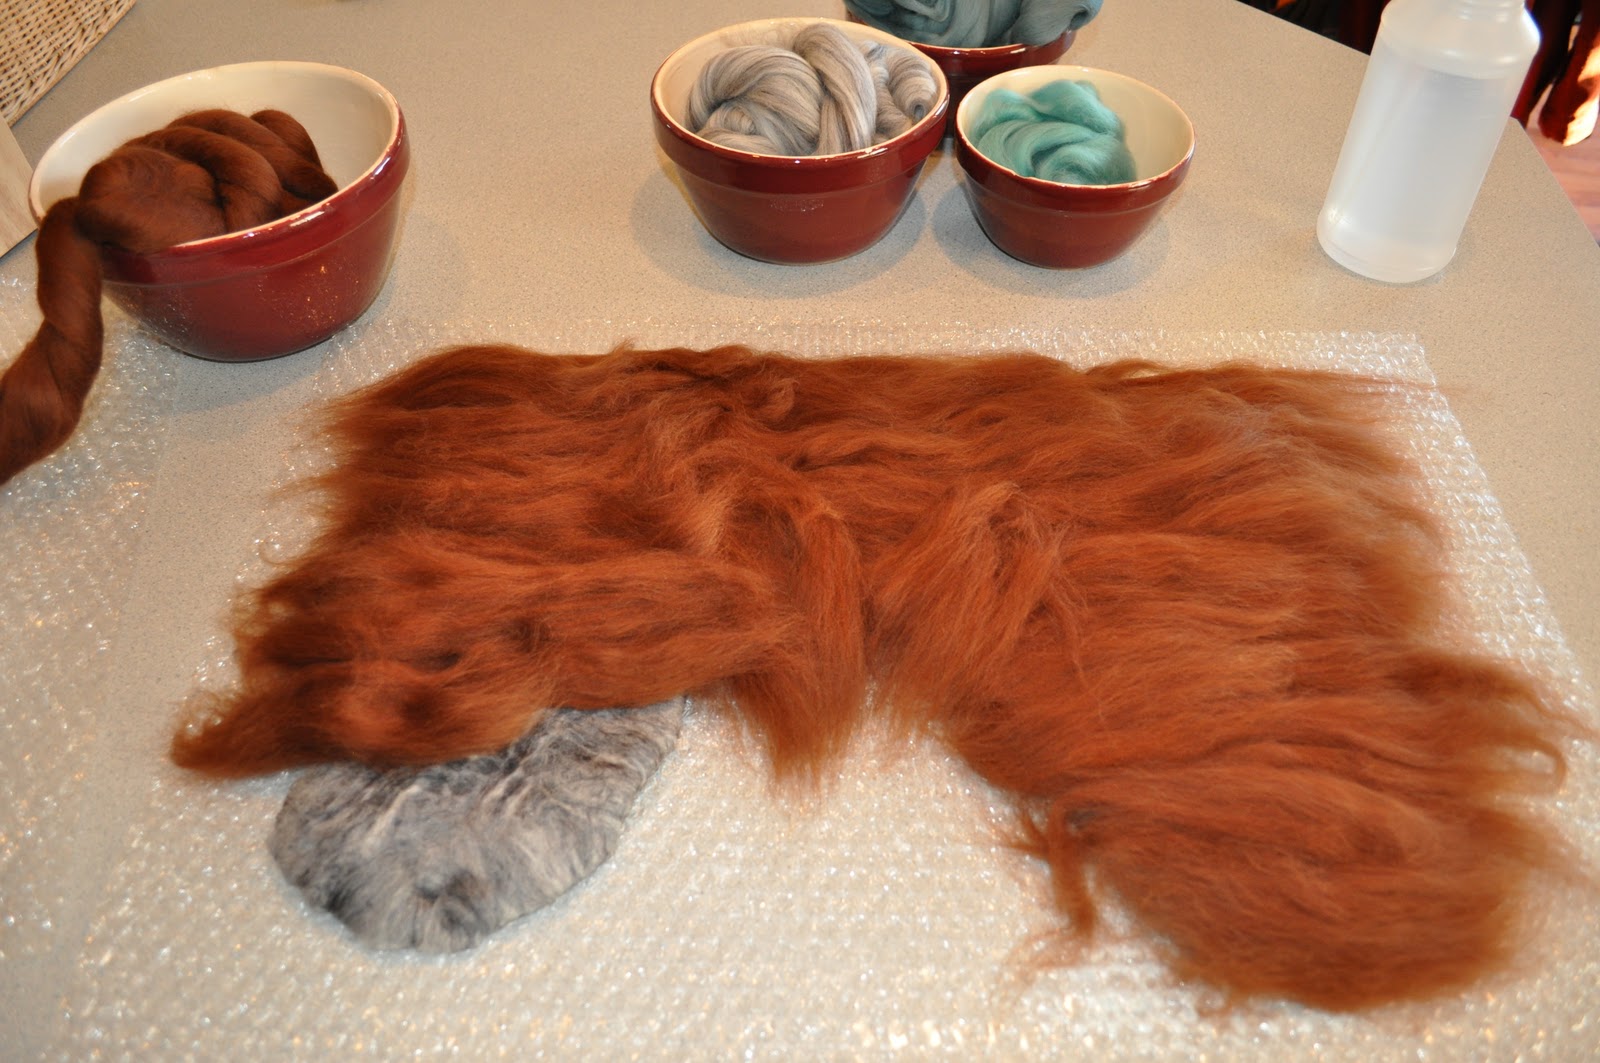
Lay the horseshoe shape down, and start pulling a light tuft of wool from the roving bundle. Grab the end of the roving and gently tug, this will pull off a small piece each time.


Do this until the entire horseshoe is covered. This will act as the liner of the slippers, so it doesn't matter the color or design of the wool. Once covered, wet with water from the spray bottle, this will flatten the wool and help adhere the wool to itself. Put the large sheet of bubble wrap over the wet wool.
Horseshoe pattern covered with wool
Covered with layer of bubble wrap


When done with one side, flip over and add a layer to the other side, folding the excess over the edge as close to the pattern to keep shape.  Once liner is done, continue with the color wool you would like to make the slipper following the same technique of pulling tufts and placing them on the pattern.  Wet down each layer before flipping or adding more wool.


When the final top layer (brown layer for photos) is complete, you can add your own blending of colors or accents. I chose to add light blue against the brown starting at what would be the ankle of the slipper. 


Wet down again and drizzle the dish soap onto the felt and cover with bubble wrap sheet bubble side down. Start to rub gently in a circular and perpendicular motion agitating the wool.  Do this to each side for at least ten minutes. This firms the felt and solidifies the felted bootie.


Cut down the center through all layers.  Take each soapy bootie to the sink and gently rub on the washing board until the felt is one solid fiber, rinse and continue to rub on the board.  Once the bootie takes the shape you would like be sure to fit it to the foot. 


Put each bootie near a warm vent or fan for drying.  I used plastic grocery bags to keep the shape of the slippers while they dried.
Slippers after rinsing and Washboard rub

The Final Slipper formed and drying.

Saturday, August 28, 2010

Dinosaur Cakes

A coworker asked in a panic if I could create a dinosaur cake for her 5 year old son's birthday.  
I couldn't pass up the challenge so here it is, step-by-step:


You will need to make two double layer Dino cakes:
two nine inch cake pans
frosting spatula (this will change your life)
4 cake mixes and listed ingredients from box
6 cans of frosting
neon food coloring
whoppers, chocolate disks, gummy eyes 


1. Bake the cakes. Each mix works for two pans.
2. Cool, wrap and freeze
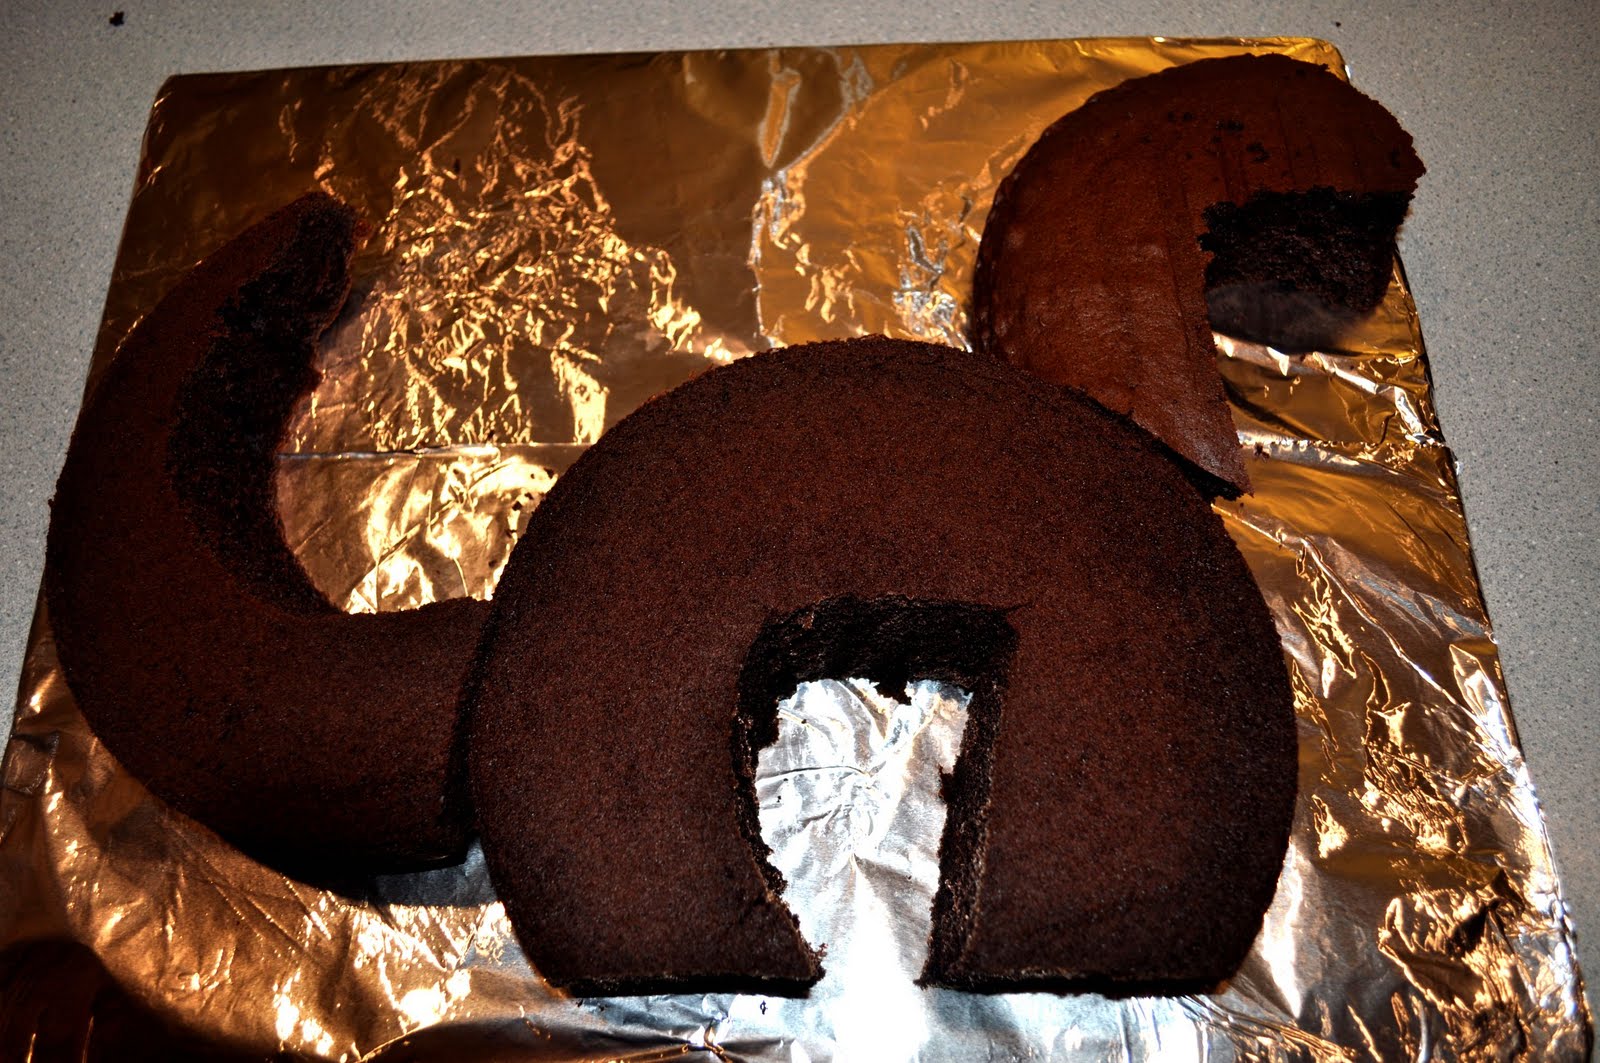
3. Carve each cake into a body, tail, and head. The first round needs to be cut three inches off the bottom and cut into a horseshoe to create body. The 2nd round can be trimmed into a tail and head to the shape of your liking.
4. Glue to display board with frosting
5. Layer cakes with frosting, use skewers to "dowel" weak areas (trust me, otherwise Dino-decapitation can occur)
6. Crumb layer with frosting (put a thin layer to keep the crumbs from interfering with the final frosting), freeze for 30 minutes
7. Complete Frosting keeping it as smooth as possible
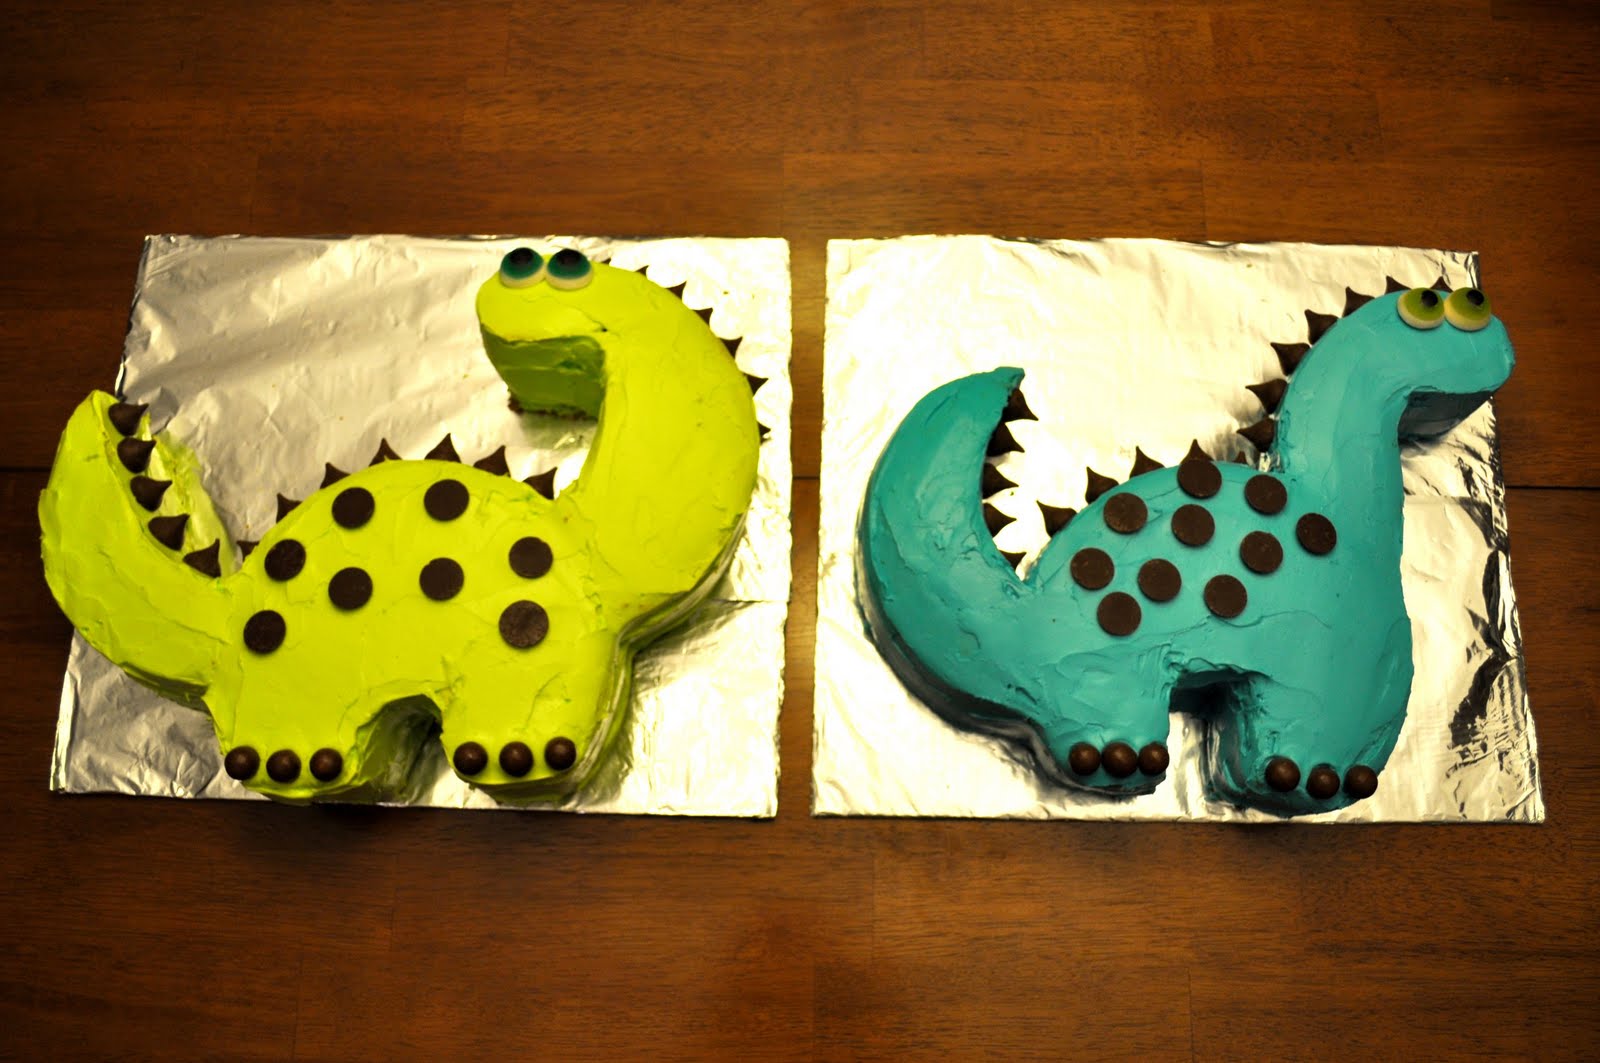
8. Place three Whoppers at feet for toes, chocolate disks for spots, Hershey kisses for spikes, and gummy eyes


Tada!  Inexpensive, super-cute and perfect for those little kiddos who love Dinosaurs!

Saturday, July 17, 2010

My Favorite Dish

This Salad Costs less than $7.00 to make and is perfect for a BBQ side dish.

Ingredients:
Can of Sweet Kernel Corn
Can of White Kidney Beans
Can of Red Kidney Beans
1 Medium Lime
Bundle 'o' Cilantro


Rinse all ingredients in cool water


Chop Cilantro


  Mix together in a big bowl


Cut lime in half, and squeeze juice over salad


Mix, Refrigerate and enjoy.


Saturday, June 19, 2010

Adventures in Home Ownership

Our deck was considered completely unsafe; dry rot, rusted nails, and no bolting to the house.  It had to be replaced.  So when we were getting married last summer we requested in lieu of a registry, that people help us fund for our home projects-mainly the deck.  So after the wedding madness, the typical Northwest weather came in and we couldn't build.

Kevin and I took our tools out this month and took down the old rickety deck and had a work party made up of friends and family to help us.  This all happened in one week from destruction of the old deck, to the final railing on the new deck.

Before: (no railings as they were taken down over a year ago) 

Destruction- We managed to save all of the old wood (except for the most dry rotted) It will most certainly be reused in other "old west" dog houses, planter boxes and general woodworking my husband thinks up. 

Lots of Nails, lots of wiggling. 

Here is the dry rot....so dangerous. Your foot would step right through.
We then disconnected the whole structure from the house, which was relatively easy- it was only nailed to the siding (no bolts).  We simply wrapped the deck with a utility rope and pulled, hoping it wouldn't crash into our sliding glass door.
 
No more deck poorly connected to the house....
Only one major injury... hammering your own hand results in a lot of swelling and a big fat bruise....

To my surprise, no injuries with this part, had to bust out some concrete to set our pillars.
There was staining....a of staining. I spent every day after work staining all of the wood so it would be gorgeous when it went  up. It paid off.
Then the troop came out... there was some man talk, some beer drank and the deck went together piece by piece.
Then the beautiful railing was put up.  It is my favorite part.  It is safe, functional, and looks so nice. 
 The final product is exactly what we wanted.  We spend as much of our time out there already.